You love your dog. You love your SUV. But the first time muddy paws hit that $2,500 quilted leather seat, your stomach drops. Spec’ing a pet friendly SUV isn’t just about cute accessories — it’s about protecting a serious investment and keeping your co-pilot safe.
I’ve seen everything from clawed-up Bentley Bentayga seats to Chewy chewing through a $600 wiring harness in a cargo panel. In this guide, I’ll walk you through the luxury SUV features that actually matter for dogs, the smart upgrades worth your money, and which “pet packages” are just dealership fluff.
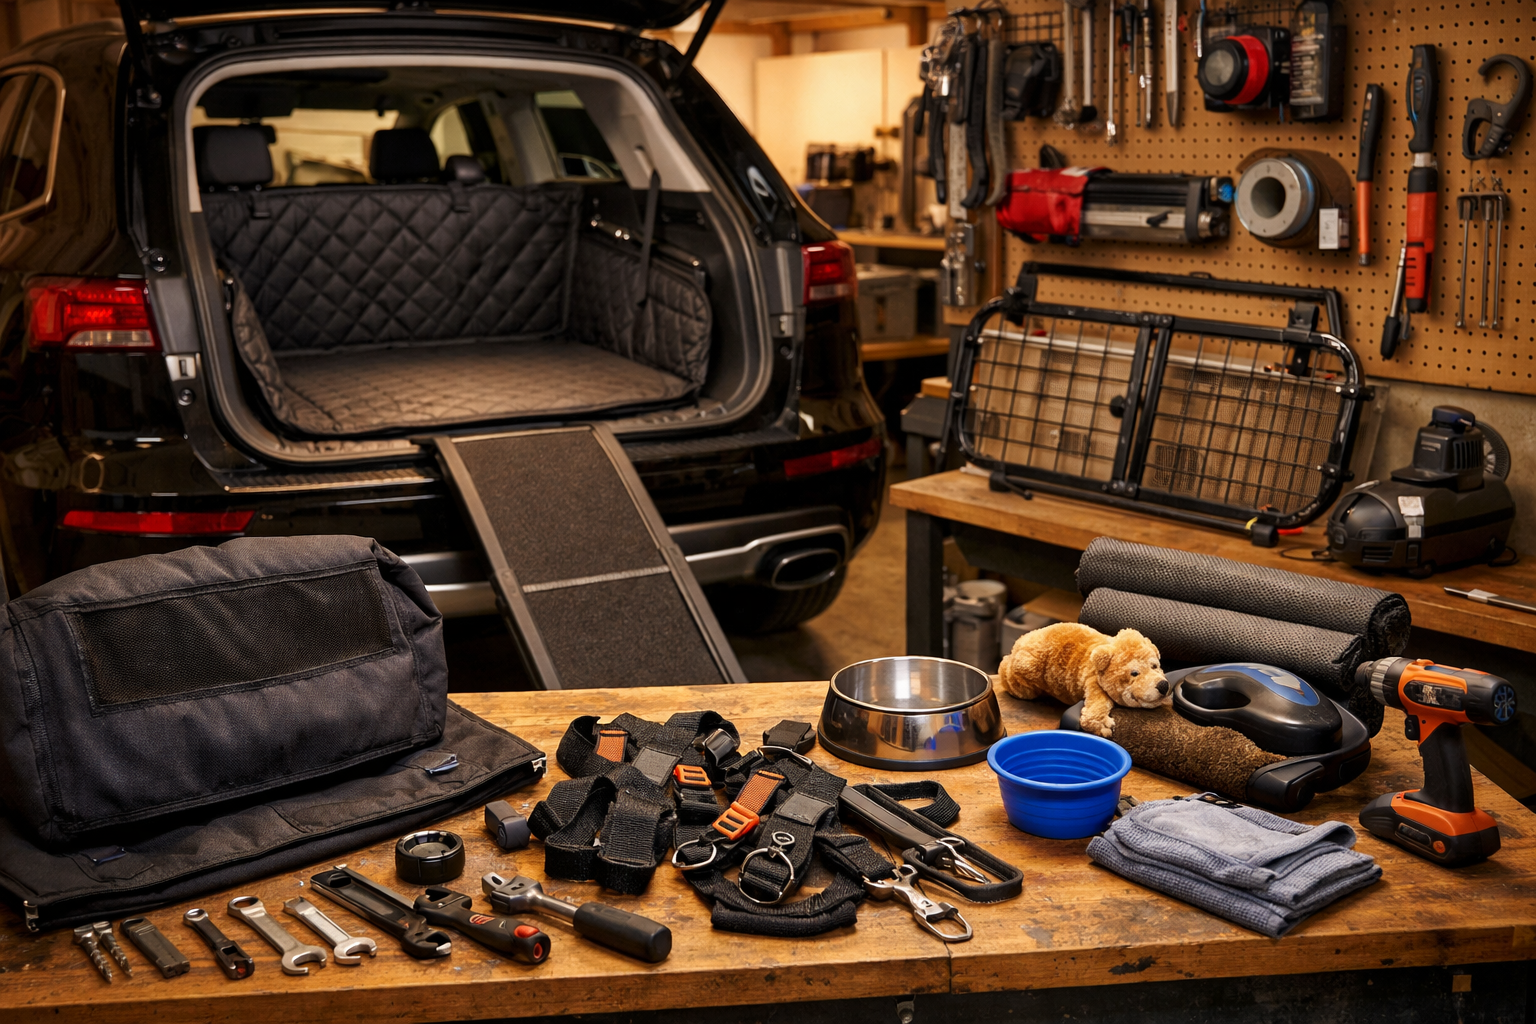
What You’ll Need
- Tools: Trim removal tool, T30 Torx bit, 10mm socket, torque wrench (for seat anchor points), utility knife
- Parts/Materials: Pet barrier ($120–$300), heavy-duty seat cover ($80–$250), cargo liner ($100–$400), dog ramp ($150–$350)
- Time: 30 minutes for basic setup; 2–3 hours for hard-mounted barriers
- Difficulty: 🔧🔧 (Most installs are straightforward)
- Dealer Cost: $1,200–$3,500 add-ons vs DIY Cost: $350–$900 — You Save: $800+
Why This Matters for a Pet Friendly SUV
A 70-pound Labrador in a crash becomes a 2,000-pound projectile at 30 mph. That’s not scare tactics — that’s physics. The NHTSA has repeatedly stressed the importance of restraining cargo and pets for a reason.
Beyond safety, resale value takes a beating. I’ve appraised trade-ins where claw damage knocked $1,500 off the offer. And luxury brands? They don’t discount reupholstery. Bentley Bentayga pets might look glamorous in brochures, but replacing hand-stitched leather is five figures.
If you drive year-round, think seasonal too. In winter states, salt and slush soak into carpet fibers. If you’re already reading up on snow tires in mild winters, you know preparation matters. Same goes for your dog setup.
Before You Start
⚠️ WARNING: If you’re mounting anything to seat frames or cargo tie-downs, consult your owner’s manual for torque specs. Over-tighten and you can strip threads. Under-tighten and that barrier fails in a crash.
⚠️ WARNING: Never drill into unknown panels in modern SUVs. Side curtain airbags and wiring harnesses run behind trim. I’ve seen a DIY cargo hook job trigger an SRS light — that’s a $300 diagnostic mistake.
Park on a flat surface, ignition off, parking brake engaged. If you’re removing trim, disconnect the negative battery terminal with a 10mm socket and wait 10 minutes before working near airbag areas.
Don’t DIY if your SUV has integrated rear-seat airbag modules or active seatbelt pretensioners you’re unsure about. On 2025–2026 luxury SUVs, that tech is common.
Step-by-Step Guide
-
Choose the Right Interior Material
Skip soft aniline leather. Go for synthetic leather (MB-Tex, Sensatec) or coated hides. They clean easier and resist claws.
Pro Tip: In 20 years of wrenching, I’ve seen perforated leather trap dog hair like Velcro. -
Install a Hard Cargo Liner
Drop-in molded liners (WeatherTech-style) protect against spills. Expect $150–$400.
Make sure it’s vehicle-specific for your 2025–2026 model. -
Add a Crash-Rated Pet Barrier
Use factory tie-down points. Typically secured with a T30 Torx or 10mm bolt. Torque to manufacturer spec (check manual).
Avoid tension-only bars — I’ve seen them pop loose. -
Use a Harness or Crate
Secure crates to cargo anchors. If using a seatbelt harness, attach only to reinforced anchors — not headrests. -
Protect Door Panels
Install door protectors if your dog stands on the armrest. Cheap $40 panels save $600 in scratched trim. -
Consider Ride Height & Access
Luxury SUVs sit high. A folding ramp ($200 average) saves your dog’s hips and your tailgate paint.
Pro Tip: Older dogs? This is cheaper than future vet bills.
If you’re shopping models, some SUVs simply package better. We’ve seen smart cargo layouts in everything from high-end crossovers to rugged imports like the Import JDM Land Cruiser. Flat load floors matter more than brand badges.
Common Mistakes to Avoid
- Trusting dealer “pet packages” blindly. I’ve seen $1,800 bundles that include $400 worth of accessories.
- Skipping crash ratings. Not all barriers are tested. Cheap Amazon units bend like coat hangers.
- Letting dogs ride loose in the front seat. Airbags deploy at 200+ mph. That’s deadly for pets.
- Ignoring ventilation. Panoramic roofs look cool, but sun load cooks interiors fast.
- Using off-brand electrical add-ons. Heated pet pads wired wrong can overload circuits. Modern SUVs are sensitive — just read about EV software recalls and you’ll see how complex systems have become.
I’ve seen this in the shop a hundred times — someone cheaped out on protection and paid triple fixing trim later.
When to Call a Professional
If you’re installing a built-in crate system, modifying seat mounts, or tapping into 12V power for pet climate systems, get help. A reputable shop might charge $300–$600 for secure installation.
Ask: “Are you using factory anchor points?” and “Will this affect airbag deployment?” If they can’t answer clearly, walk away.
Fair pricing for a professional cargo barrier install? Around $150–$250 labor. Anything over $500 better include custom fabrication.
Recommended Products
- WeatherTech Cargo Liner: $180–$320. Laser-measured. What I’d run in my own garage.
- Kurgo Tru-Fit Crash-Tested Harness: $90. Budget-friendly but safety-tested.
- Ruff Land Kennel: $300–$450. Rotomolded, durable.
- 4Knines Rear Seat Cover: $120. Waterproof and tough.
If you’re eyeing ultra-luxury like Bentley Bentayga pets accessories, compare pricing carefully. Dealer embroidered blankets for $600? You can get better for $150.
Do This
- Use factory anchor points only
- Choose synthetic or coated leather
- Install a molded cargo liner
- Secure your dog every trip — even short ones
Don’t Do This
- Let dogs ride loose in front seats
- Drill into panels without checking for airbags
- Overpay for dealer-branded accessories
- Ignore seasonal protection (salt, mud, heat)
Building a pet friendly SUV doesn’t mean sacrificing luxury — it means being smart about it. Protect the leather, secure the cargo, and think safety first. You can absolutely do this in an afternoon and save serious cash.
If you’ve got questions about your specific 2025 or 2026 model, drop them in the comments. Stay safe under there — and remember, a $20 repair manual saves a $2,000 repair bill.