You just brought home that shiny new EV, plugged it into a regular wall outlet… and realized it’s going to take 30 hours to charge. Yeah, that’s when home EV charger installation jumps from “someday project” to “I need this now.” I’ve had customers tell me it felt like buying a sports car and fueling it with a garden hose.
A proper Level 2 setup means faster charging, lower long-term costs, and fewer headaches. Done right, it also protects your house from electrical overloads and keeps your insurance company happy. In this guide, I’ll walk you through what it takes, what it costs in 2025, and where you can save serious cash by planning smart.
If you’re still deciding between plug-in options, check out our EV vs Hybrid 2026 guide first. But if you’ve already got an EV in the driveway, let’s get your garage ready.
What You’ll Need
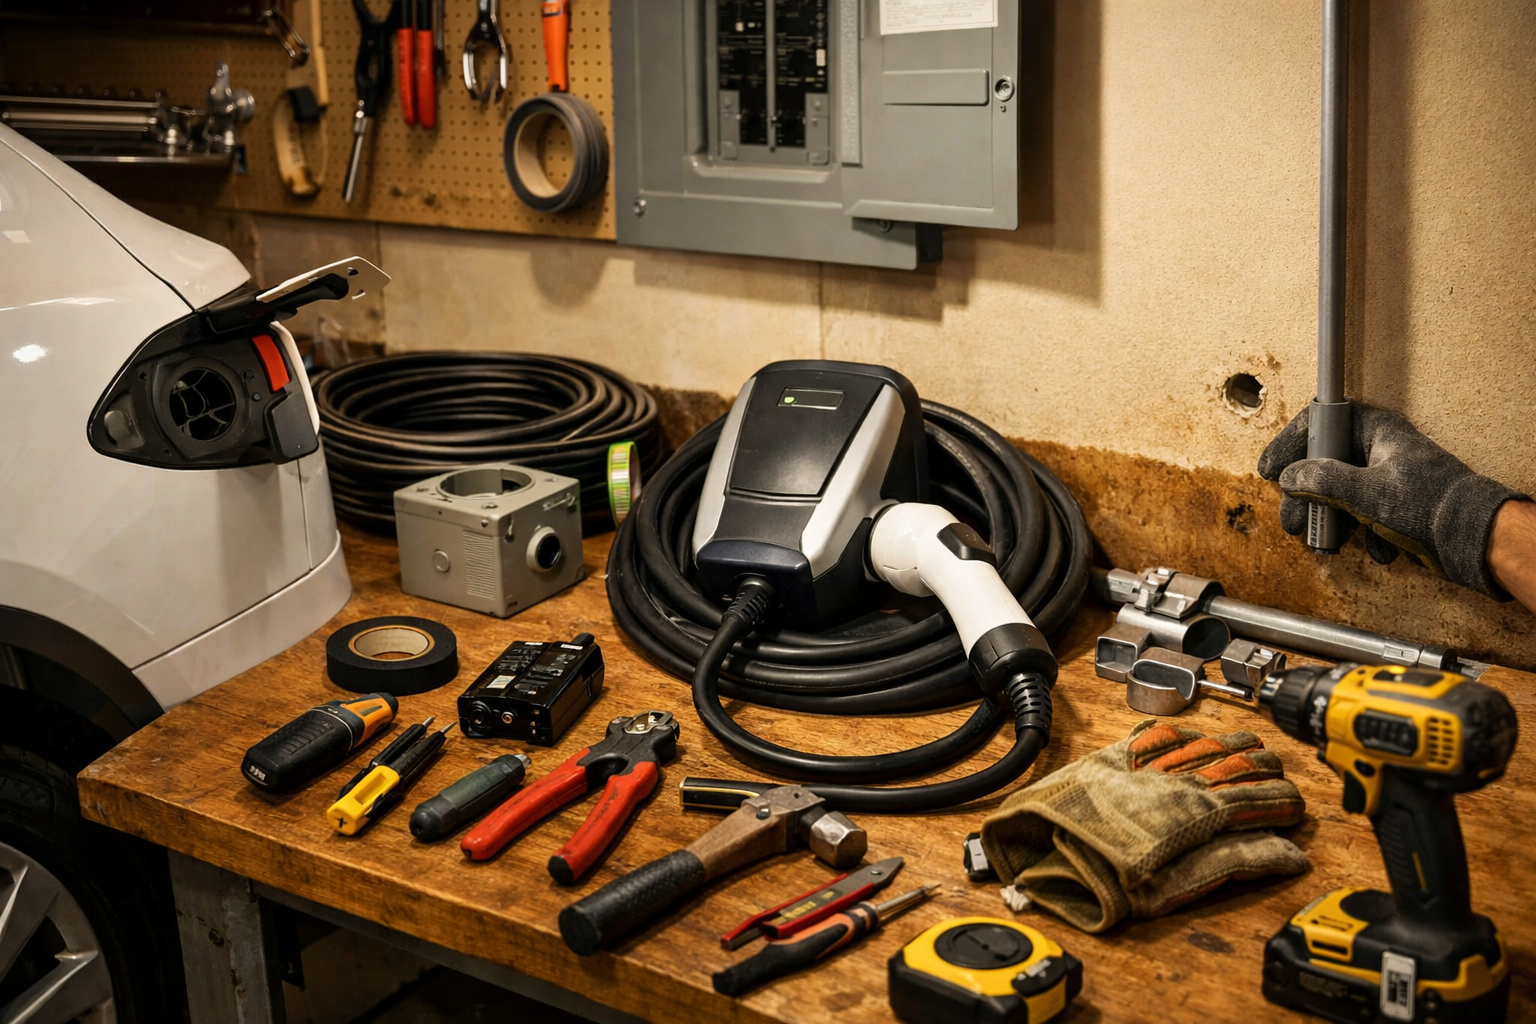
- Tools: Voltage tester, drill with masonry or wood bits, stud finder, 1/4″ nut driver, torque screwdriver (for terminal screws), conduit bender (if running exposed conduit)
- Parts/Materials: Level 2 charger ($400–$800), 240V circuit breaker ($20–$60), 6/3 or 8/3 gauge wire (price varies $3–$6/ft), NEMA 14-50 outlet ($40) or hardwire kit
- Time: 2–4 hours for electrician install; DIY planning 1–2 hours
- Difficulty: 🔧🔧🔧🔧 (electrical work — advanced)
- Dealer Cost: $1,500–$2,500 installed vs DIY planning + electrician $800–$1,200 — You Save: $700–$1,300
Why This Matters
Charging on a standard 120V outlet (Level 1) adds about 3–5 miles of range per hour. A Level 2 charger bumps that to 20–40 miles per hour. That’s the difference between “ready every morning” and “hope I don’t have to run errands.”
Bad home EV charger installation can overload panels, melt wires, or trip breakers constantly. In 20 years of wrenching, I’ve seen overheated wiring turn into full-on garage fires. Electricity doesn’t give second chances.
Most EV owners should consider installing Level 2 within the first month. If you drive more than 30 miles a day, it’s basically mandatory. And if you’re planning ahead for a new purchase, our Buying an EV 2026 guide breaks down charging needs by model.
Before You Start
⚠️ WARNING: Working inside an electrical panel can cause severe shock or death. If you are not experienced with 240V circuits, hire a licensed electrician.
First, check your main service panel. Most homes need 200-amp service to comfortably support an EV charger. If you’ve got 100-amp service and electric appliances, you may need a panel upgrade ($1,500–$3,000).
Call your utility company about off-peak EV rates. Many offer rebates $200–$500 for smart chargers. Also check local permits — most municipalities require one for 240V circuit installs.
If your panel is full, aluminum-wired, or showing corrosion, that’s not a DIY moment. Get a pro involved. You can verify electrician credentials through ASE.com for automotive professionals, and your state licensing board for electricians.
Step-by-Step Guide
- Evaluate Your Electrical Capacity
Remove the panel cover (only if qualified) and confirm available breaker slots. Look for a 40A or 50A double-pole breaker space. Most Level 2 chargers need a 40A circuit minimum. Consult your EV manufacturer’s charging specs. - Choose Plug-In vs Hardwired
NEMA 14-50 outlet setups are flexible and cost about $100 less to install. Hardwired units are cleaner and often required outdoors. Pro Tip: Hardwired installs reduce one failure point — I prefer them in my own garage. - Select the Right Charger
Look for UL-listed units with Wi-Fi scheduling. Brands like ChargePoint, Emporia, and Wallbox run $400–$800 in 2025. Match amperage to your vehicle — most 2025–2026 EVs accept 32A–48A Level 2 charging. - Run the Correct Gauge Wire
For a 50A circuit, use 6-gauge copper wire. For 40A, typically 8-gauge copper. Wire length affects voltage drop — longer runs may require thicker wire. This is where electricians earn their money. - Mount the Charger
Use a stud finder and lag bolts into wall studs. Mount about 48 inches from the floor. Keep cable off the ground to prevent damage. [Image: Wall-mounted EV charger positioned beside garage door] - Test and Inspect
After installation, test voltage with a multimeter. Confirm breaker labeling. Schedule inspection if required by local code.
If your EV supports vehicle-to-home backup, like some PHEVs and BEVs, you might also want to read this RAV4 PHEV home power guide to understand future expansion options.
Common Mistakes to Avoid
- Undersizing the circuit. I’ve seen 30A circuits installed for 40A chargers. That breaker will trip constantly.
- Using cheap extension cords. Don’t. Ever. Heat buildup equals fire risk.
- Ignoring permits. Insurance companies can deny claims over unpermitted electrical work.
- Mounting too far from the charge port. Measure your car’s port location first — Tesla vs Hyundai vs Ford all differ.
- Skipping surge protection. Power spikes can fry $600 chargers fast.
When to Call a Professional
If your panel needs upgrading, you’re looking at $2,000 on average in 2025. A straightforward home EV charger installation by a licensed electrician typically runs $800–$1,500 depending on wire length.
Ask the electrician:
- Are you pulling a permit?
- What amperage circuit are you installing?
- Is the wiring copper and sized correctly?
Red flag: flat quotes without seeing your panel. That’s how surprise add-ons happen. And always check for open recalls on your EV at NHTSA.gov before investing in charging hardware.
Recommended Products
- Emporia Level 2 (48A) – Around $399. Budget-friendly, solid app control.
- ChargePoint Home Flex – $699. Reliable, widely supported.
- Wallbox Pulsar Plus – $650. Compact, great for tight garages.
- Siemens 50A Double-Pole Breaker – $40. What I trust in my own installs.
What I use in my own garage? Hardwired Wallbox on a 50A breaker with whole-home surge protection. Overkill? Maybe. But I sleep better.
Do This
- Install at least a 40A circuit for future EV upgrades
- Check for utility rebates before buying
- Mount charger near your vehicle’s charge port
- Use copper wire, properly sized
Don’t Do This
- Don’t cheap out on electrical components
- Don’t overload a 100A panel without evaluation
- Don’t skip permits or inspections
- Don’t assume all chargers are the same amperage
A smart home EV charger installation turns your garage into your own fueling station. No more gas stations, no more waiting around. You can absolutely handle the planning side of this, and with the right electrician, keep costs under control.
Got questions about your panel setup or charger choice? Drop them in the comments. Stay safe around electricity, and remember — a $20 repair manual saves a $2,000 repair bill.